
Learn photography online: basic concepts
In this series of articles, you will learn photography online with fun and simplicity. Here, we will focus on the basic concepts that you need to keep in mind before reading other blog posts and going further in your photography journey. You will see great improvements immediately, learn how to take better pictures, and be more aware of your camera.
Enjoy the lecture, and let’s get started!
What’s a Camera?
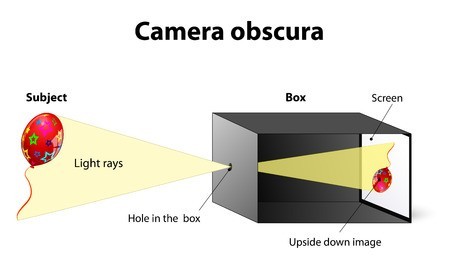
A camera is a dark box with a hole. The light from an external subject outside the camera passes through this hole, and, as a result, an image is projected inside, where the subject is reproduced with high details and colors upside-down and reversed in a surface—a screen—inside the box. The surface can be a paper, a wall, a film, or a digital sensor.
Nowadays, all cameras use lenses, rather than holes. This allows for better control of the projected image and provides a different set of apertures, or values of brightness, and maintains the focus of the image being projected.
How can I control my camera?
There are 5 main elements to manipulate your picture in a camera:
- Lens Aperture
- Shutter Speed
- ISO
- Exposure
- Focal Length
Let’s see them one by one.
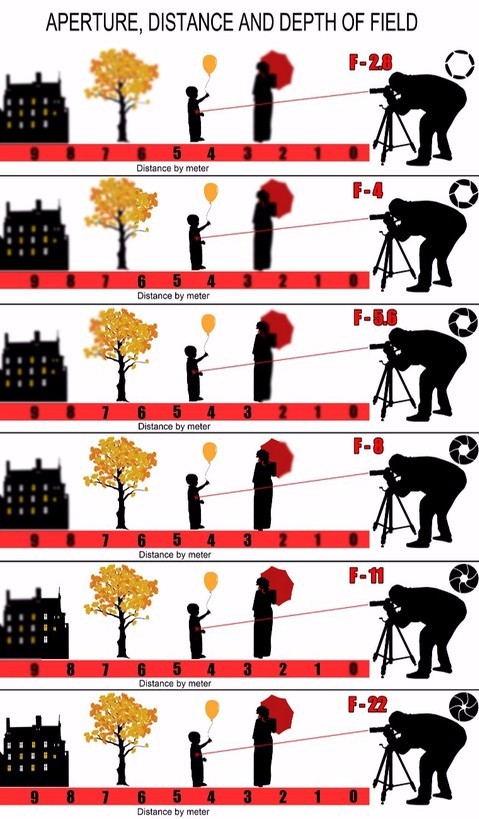
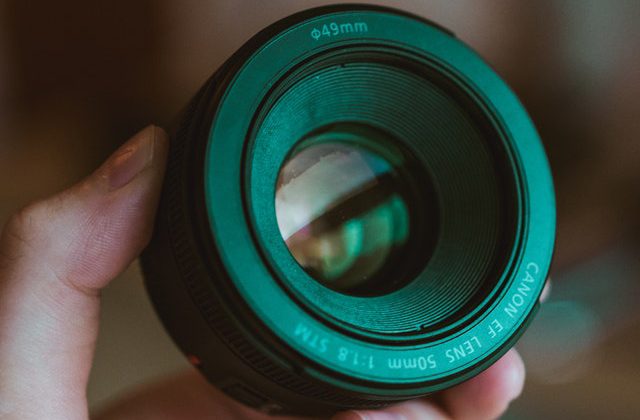
Lens Aperture
Lens Aperture is represented by f-numbers called “f-stops” (the F comes from the word finestra in Italian, which means window). This value shows how open the camera “hole” is. The lower the number, the more open the lens is. This is a bit counter-intuitive, but it is a convention we need to get used to.
Here, you can see in the image how the aperture increases as the number decreases.
.
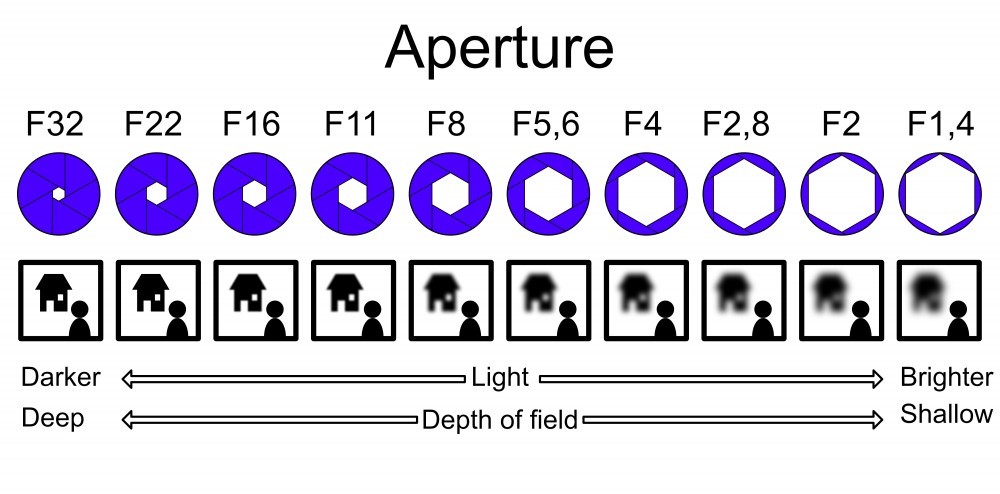
The more open the lens is, the more light will enter. That’s why this works hand in hand with the speed at which you keep the camera hole open—the shutter speed.
Lens aperture also controls the depth of field, as I will show you later on. For now, please refer to the image above to sum up and fix this concept in your mind
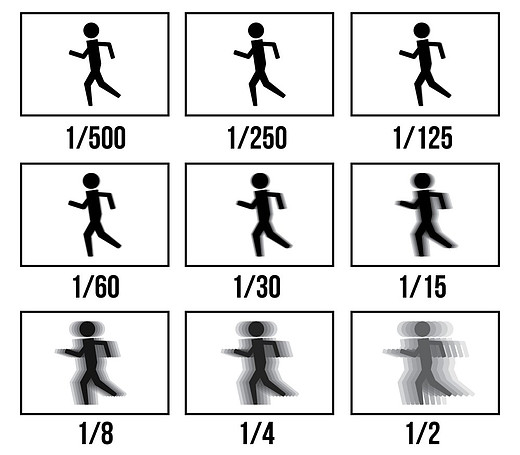
The Shutter Speed.
The shutter speed is a very simple and straightforward concept. It is the exposure time, represented as the length of time the digital sensor or the film inside the camera is exposed to light. When you click the shutter button of your camera, the camera’s shutter (it is exactly like a window) opens and lets the light enter. The greater the time of your shutter speed, the more light that reaches the sensor.
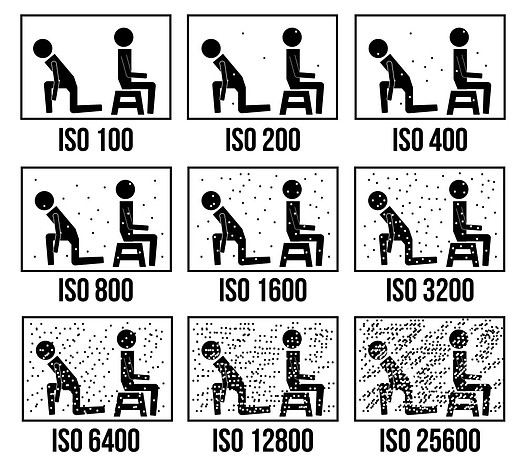
The ISO.
This is an elementary part to understand and can be helpful to solve our problems when we have little light at our disposal for a photo. It is simply the sensitivity of our sensor to the light. A low ISO number corresponds to a lower sensitivity. That means that, if we increase this number, we are going to gather more light in a fraction of the time.
But why do you need this? Imagine it’s night, and there is a very low light. You can decrease the f number to the minimum value and with that increase the lens aperture, but, if the light is still not enough, you also must decrease the shutter speed. There is a limit at which you will start to see motion blur. The motion blur will make your picture not look in focus and will annoy you when don’t have your flash with you.
We may gather some beautiful artistic pictures, and nothing else, but we have a secret weapon within our camera: increase the sensitivity of your sensor! That is the ISO number. When you increase it, you will have more light coming into your sensor, and the shutter speed also can be increased as result.
However, we need to keep in mind that the quality of the picture will decrease. In fact, ISO values that are too high correspond to added noise in the picture. This noise is visible with a little grainy effect that will make your picture less attractive. As a result, it will lose details and consistency. Modern cameras are doing excellent work to eliminate this effect. There are other techniques you can use to get rid of this annoying side effect. We will speak about this in upcoming posts, videos, and workshops.
The Exposure
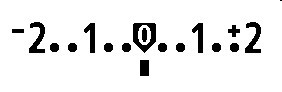
Exposure is measured by a component in your camera called “built-in exposure meter”. Without making things complicated, what we need to understand is that we need to balance the light that is hitting our sensor with all three components we just introduced (lens aperture, shutter speed, and ISO), and the exposure meter is telling us (upon criteria defined by the “software” installed in the camera) if these elements are balanced. If they are, we will have a value like I showed in the picture, which will tell us that the camera thinks these values are perfectly exposed. If we are underexposing or overexposing, the indicator (this little dot under the number 0) will move left or right. An underexposed image will result in a darker image; an overexposed image will result in a brighter image that is “washed out”.
The perfect exposure is not measurable with the camera exposure meter, and we shouldn’t rely only on what was established by the default option in our camera. You always can underexpose or overexpose to better reach the composition and effect you want, but, of course, this instrument is an excellent help while you’re shooting, regardless of whether you’re a beginner, advanced, or pro.
You can try to better measure the light using a light meter. I will speak about this useful tool in a future post. At this stage, try to use your eyes to get the picture exposed correctly, and read the manual of your camera to understand how to use this option to manually adjust the exposure as you wish.
Focal Length
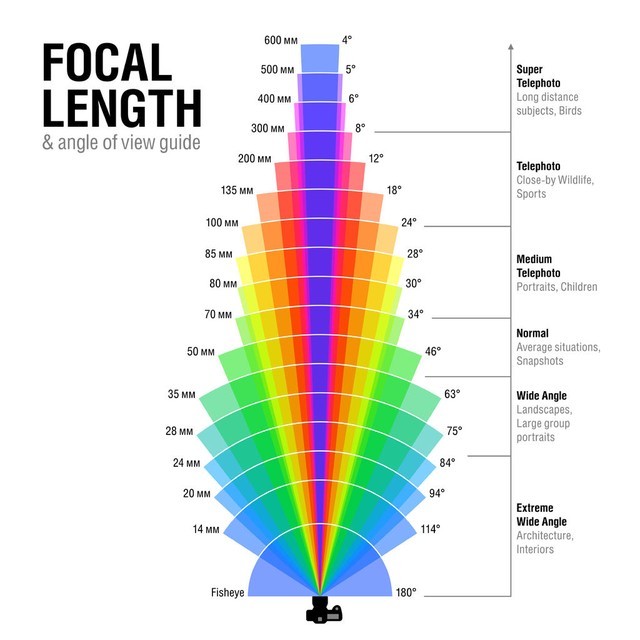
As you may realize, there is another measure on your lens, usually represented in millimeters (mm). The focal length tells how much of the scene will be captured and how much the magnification will be. The higher the focal length, the greater the magnification and the narrower the angle of view. The lower the focal length number, the lower the magnification and the wider the angle of view. In other words, when the number is low (for example, 16mm) you will include more elements in your picture. When the number is higher (for example 50mm), you will zoom into the subject of your picture.
Of course, this may create some problems. The focal length choice will affect what you see if you get to close to the subject. Different focal length lenses will “see” the same scene differently when you try to frame the subject in the same way:


As you can see in this example, we used two different lenses (the first image is 16mm, the second is 50mm). The apparent distortion is called barrel distortion.
This happens because our camera is creating a picture that is in 2 dimensions from our reality that is in 3 dimensions. When you get too close to the subject, the wider lens will try to include all elements together, and what you see above will be the result.
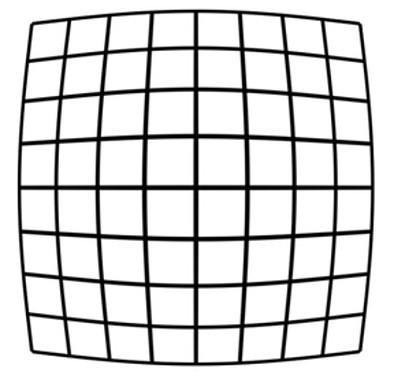 barrel distortion
This distortion happens in all lenses, but it is less visible when you increase the distance from your subject or increase the Focal Length of your lens.
How is the effect of those 5 “controls” on my photos?
Now that you learned what these elements are, and their key role with the light, let’s see what effect they produce that we may use to our advantage.
Here what’s happening when you’re using a low f-number, compared to a high number:


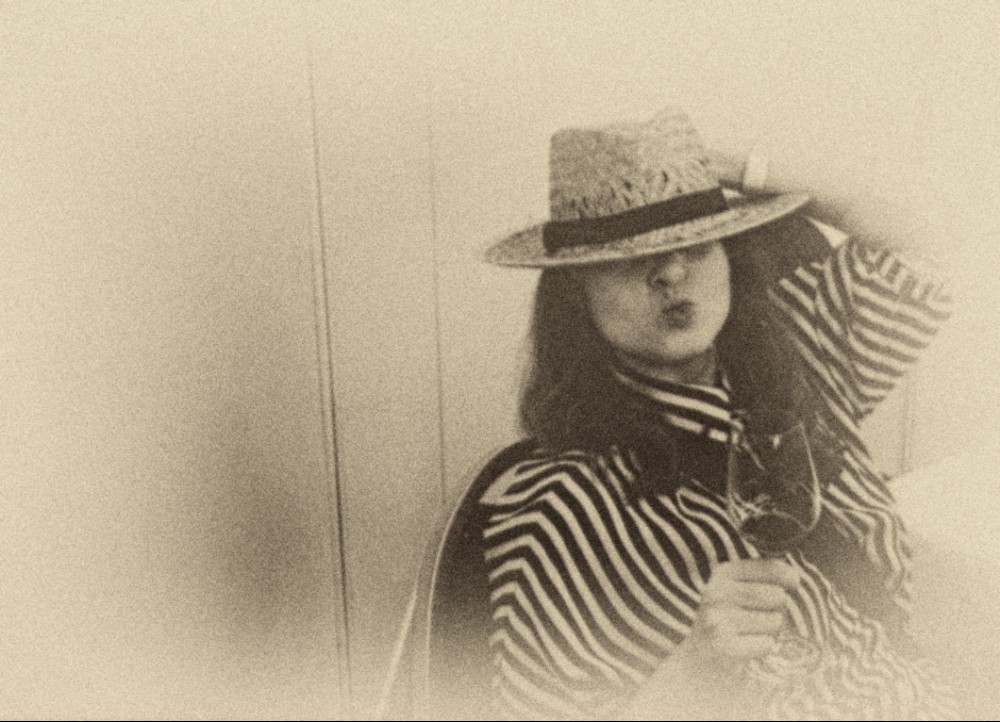
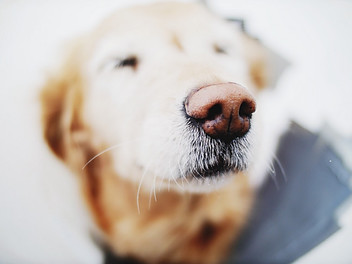
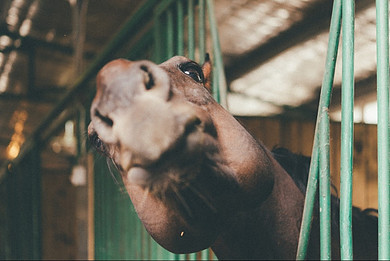
As you can see, there is a great difference between the two photos. In the first one on the left side of the slider, the “sharp area” of the picture is very narrow, and you can almost see the person popping up from the screen. When you have such small “sharp area,” it’s hard to nail the focus on the eyes and the face, but, at the same time, this gives your photos a 3D effect that you won’t have using a high focal number. This “sharp area” is technically called “depth of field”. We will come back to these concepts, but what is important to remember here is that the size of the aperture has an immediate impact on the “sharp area” of the image (the depth of field). A high “f-number,” such as f/22 (small aperture), will bring all foreground and background elements into focus. In this case, the “sharp area” of the picture is large, and we have a large “depth of field”. Instead, a small f-number, like f/2, will isolate the foreground from the background, making the foreground items sharp and the background blurred, giving this “3D effect” to our pictures.
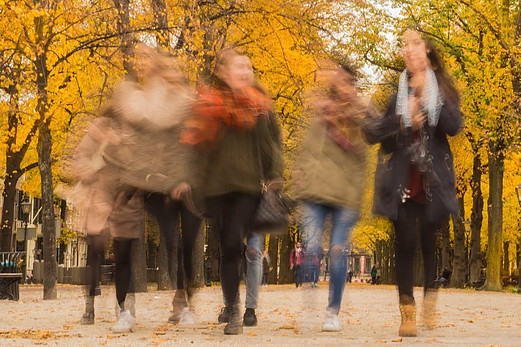
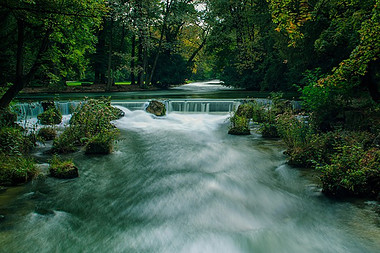
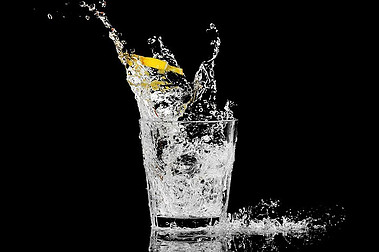
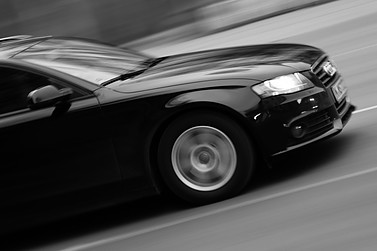
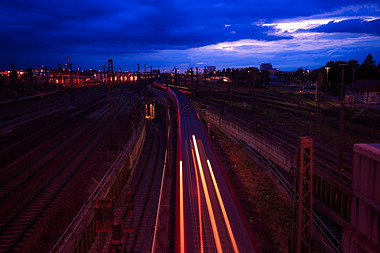
What about shutter speed? Here, you can get creative; the only limit is your fantasy. For example, you can set your shutter speed to 1/10-1/40 of a second and try to give a motion effect to a car moving, you may make a flowing cascade like “cream” in a river, you may freeze a drink in the air, or you can show a traffic jam at night.
Also with using ISO, you can get really creative. As I already mentioned, a high ISO number produces a grainy effect, the so-called noise in the image. This can be an adverse effect, because the picture loses details and consistency, but you can also use this to your advantage for a “vintage” taste in your pictures.
Focal Length…well, you already understood how you can use it artistically 🙂
Here are some examples:
Conclusion
That’s all folks!
Once you get an idea of these elements we talked about, we will dig into other topics. For example, we will learn how to read a histogram and learn about the perfect white balance to catch the perfect colors, what the basic composition rules are, how to use the various modes in a camera, how to use flash or ND filters, what the best setup to shooting pictures is, and much more.
For now, I recommend you take your camera and experiment with these few things I explained. Go out, take inspiration from what surrounds you, and, if you’ve no idea where to start, take a look at this post.
I wish you a great time!
Fabio